
DIY Giani Countertop Kit - Kitchen Makeover On A Budget
After making this ginormous purchase (our home...see more here) and still wanting to do MAJOR renovations to it, we decided early on that we were going to do a good chunk of the work ourselves. We figured…we’re young and…kind of handy people so “why not?” We knew it wasn’t going to be easy or maybe look as good as what a professionals work might but we were saving a WHOLE lot of pennies this way and we were just fine with that!
Check out what we were working with before!
So when trying to figure out how we were going to save money on new countertops (one of the larger expenses when renovating your kitchen) I got to researching right away! I came across this really cool/REALLY affordable way to totally reinvent your countertops without having to buy completely new ones and I was sold!
When discovering Giani Granite, I discovered an opportunity to take something old and turn it into something new for a price that wasn’t going to kill me! And what else? I got to make it look like I paid an arm and a leg for them! When reaching out to Giani Granite to do a possible collaboration they were more than prompt to reply and not to mention accessible and timely with all my questions and concerns. I mean I received all my products the day after they shipped them (that’s good service).
When selecting my Giani Countertop Kit I knew I wanted something bright and something that was going to emulate the look of marble/quartz the best, so I went with their White Diamond Kit. This gave us the look we wanted while still allowing us the flexibility to create the exact marble look that we desired.
When it finally came time for me to refinish these horrific countertops it only took me a matter of 3 days! That's nothing! Just to give you a quick refresher...this is what our old countertops looked like...
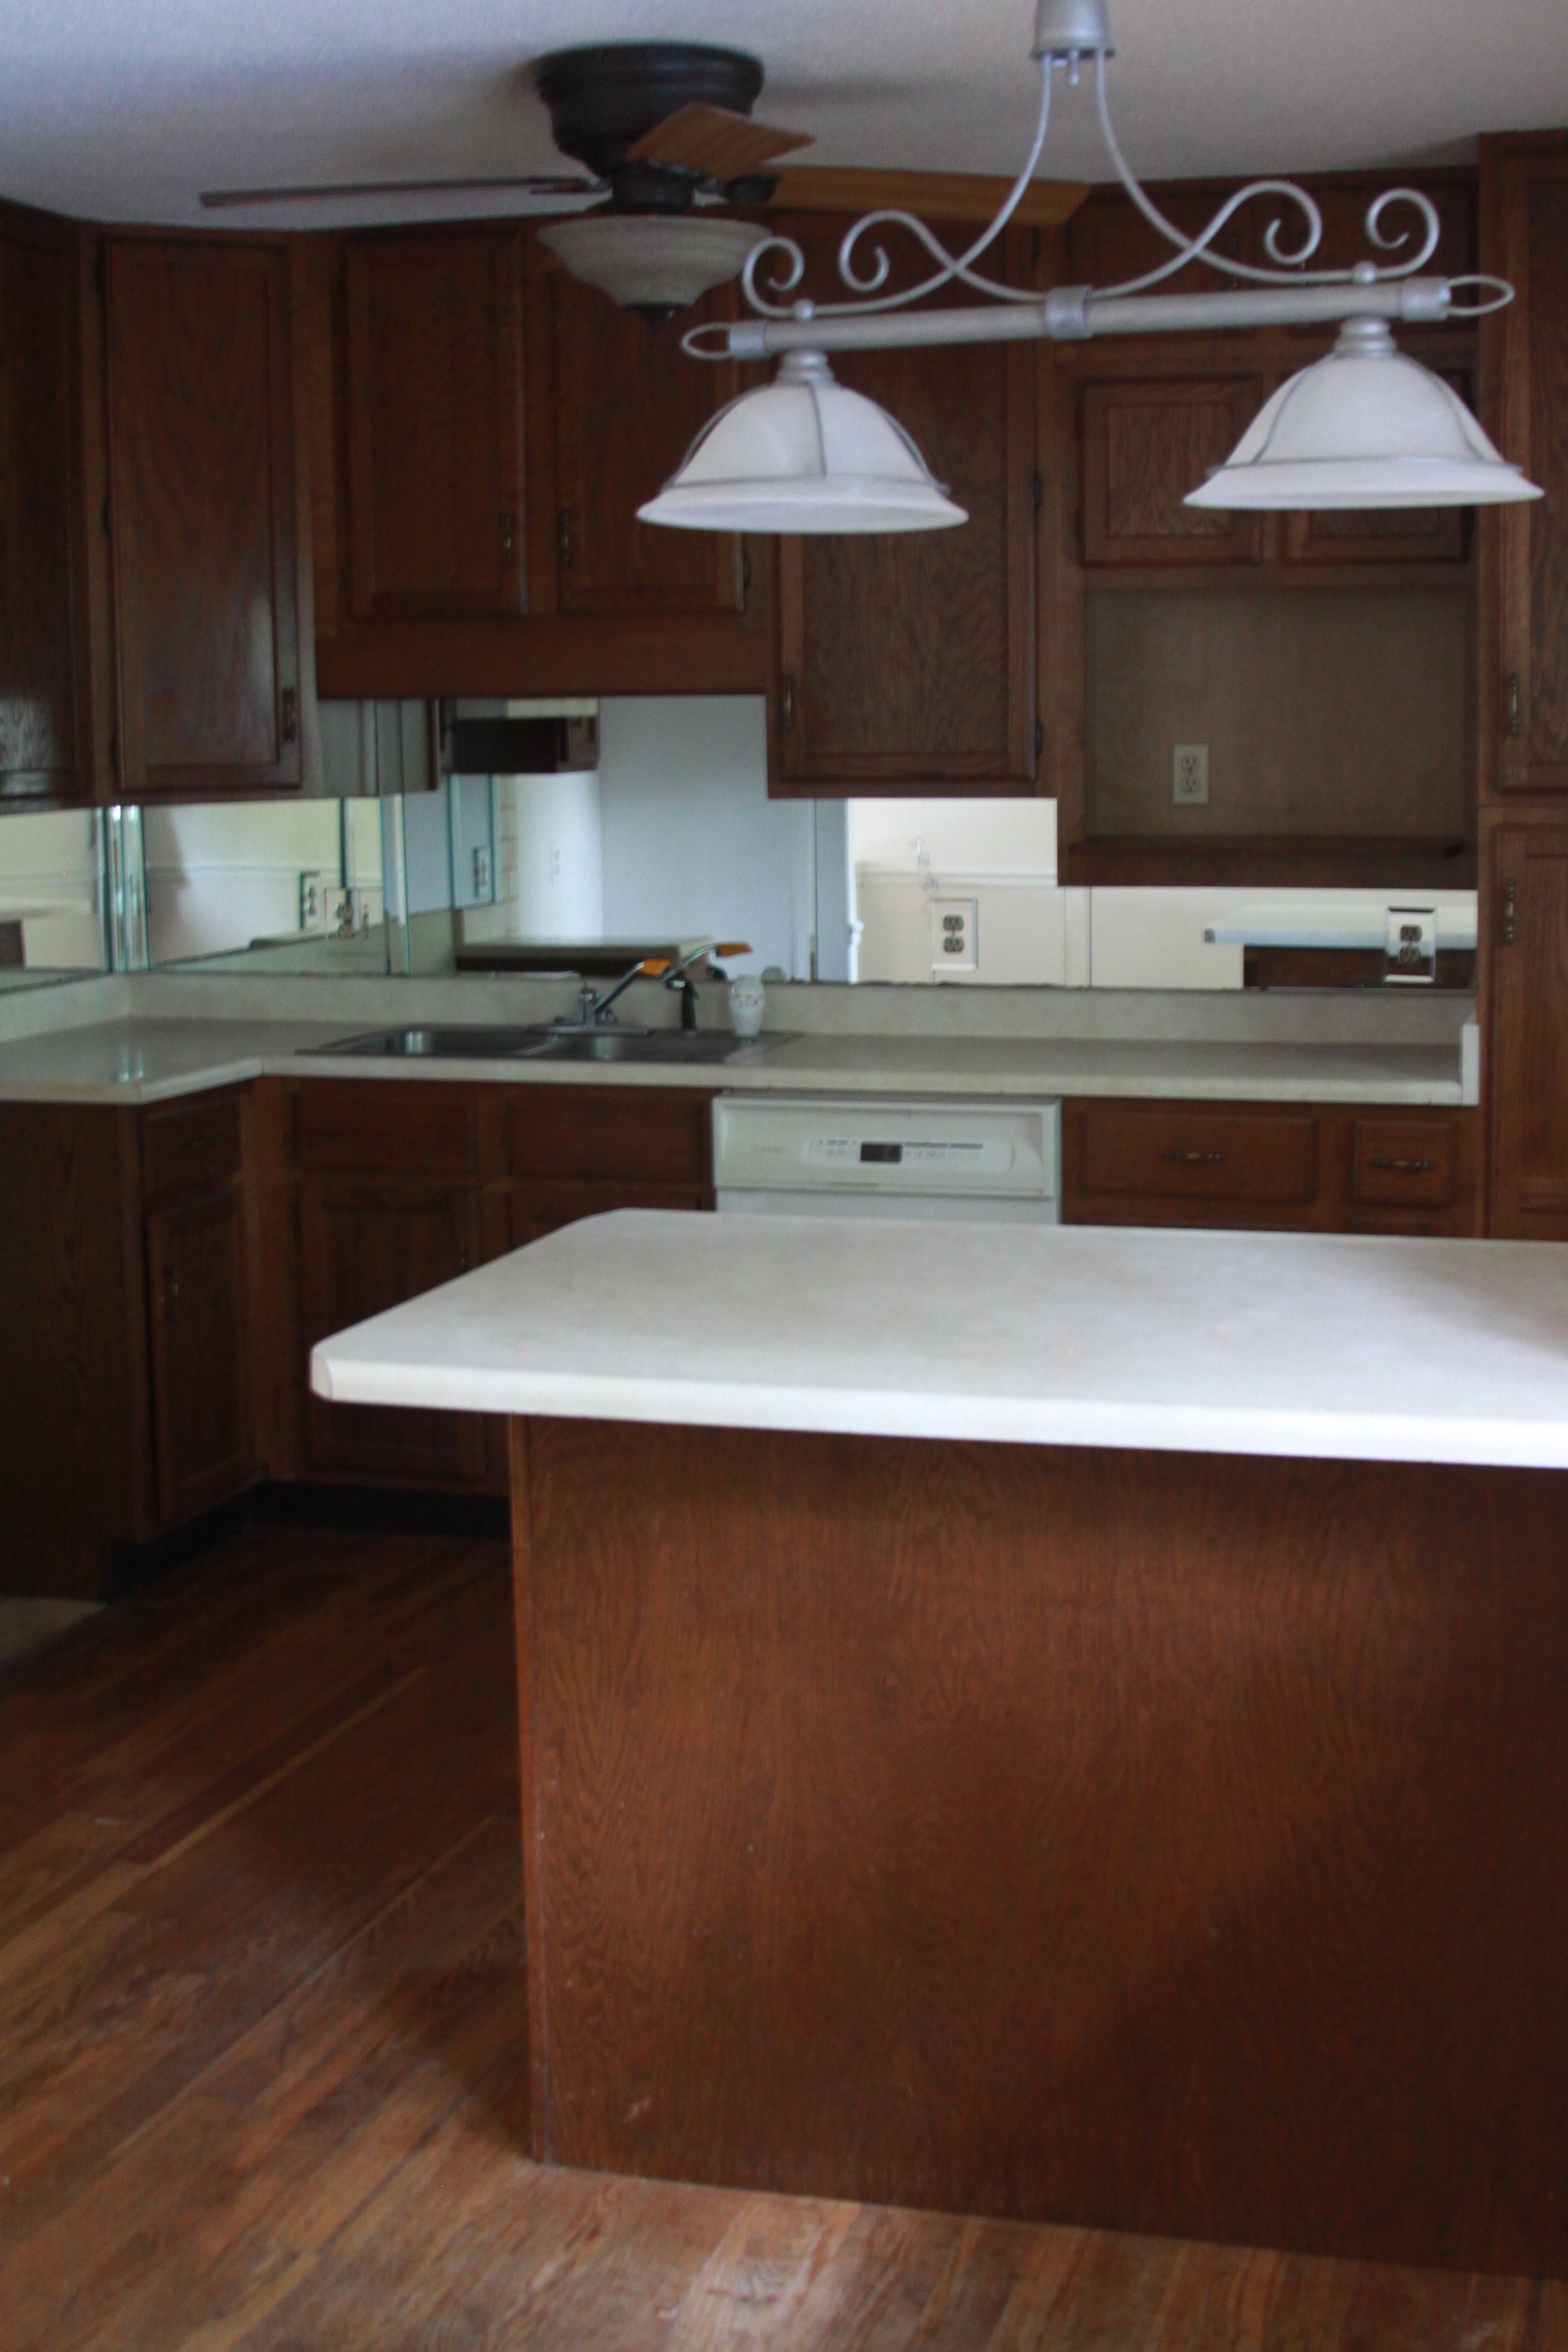
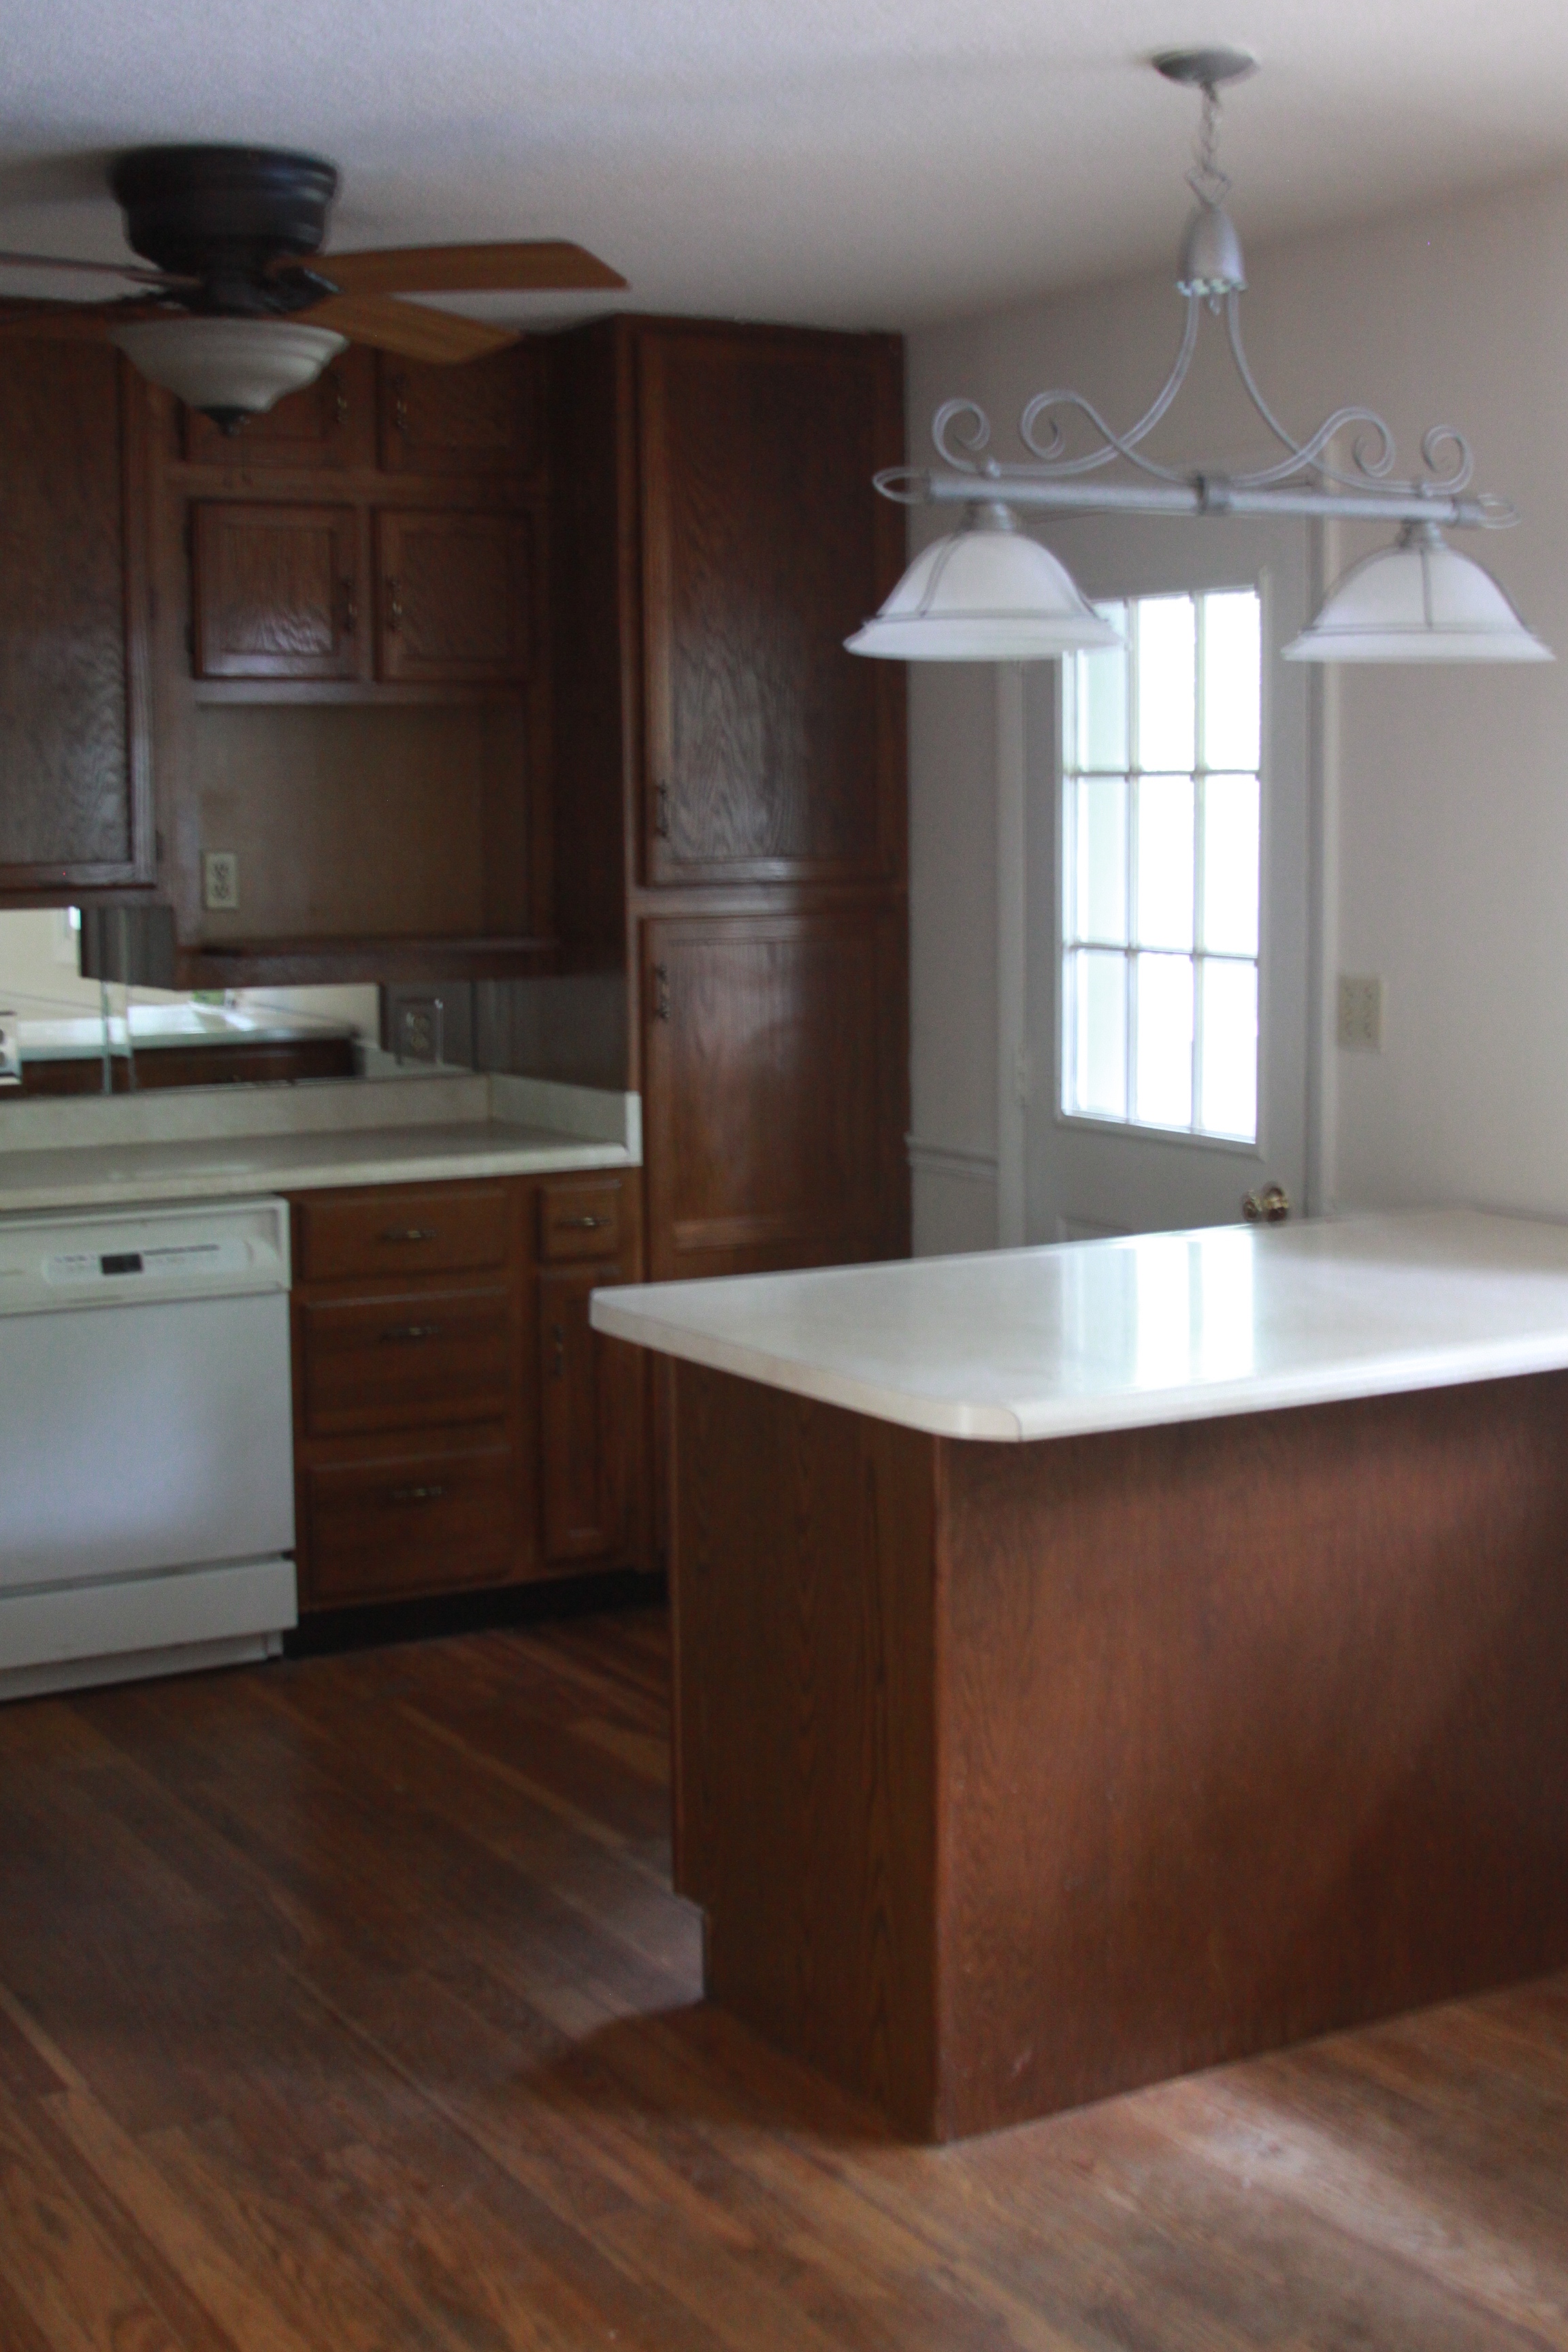
Ok...these pictures have a lot of grace for these old countertops...what you can't see is the yellow undertones that seem to pop up as little spots all across the surface. And as you can see, we didn't have a lot of countertop space to begin with but we wanted to make them as bright as we possibly could. The White Diamond Kit achieved just that! Check out our finished product!
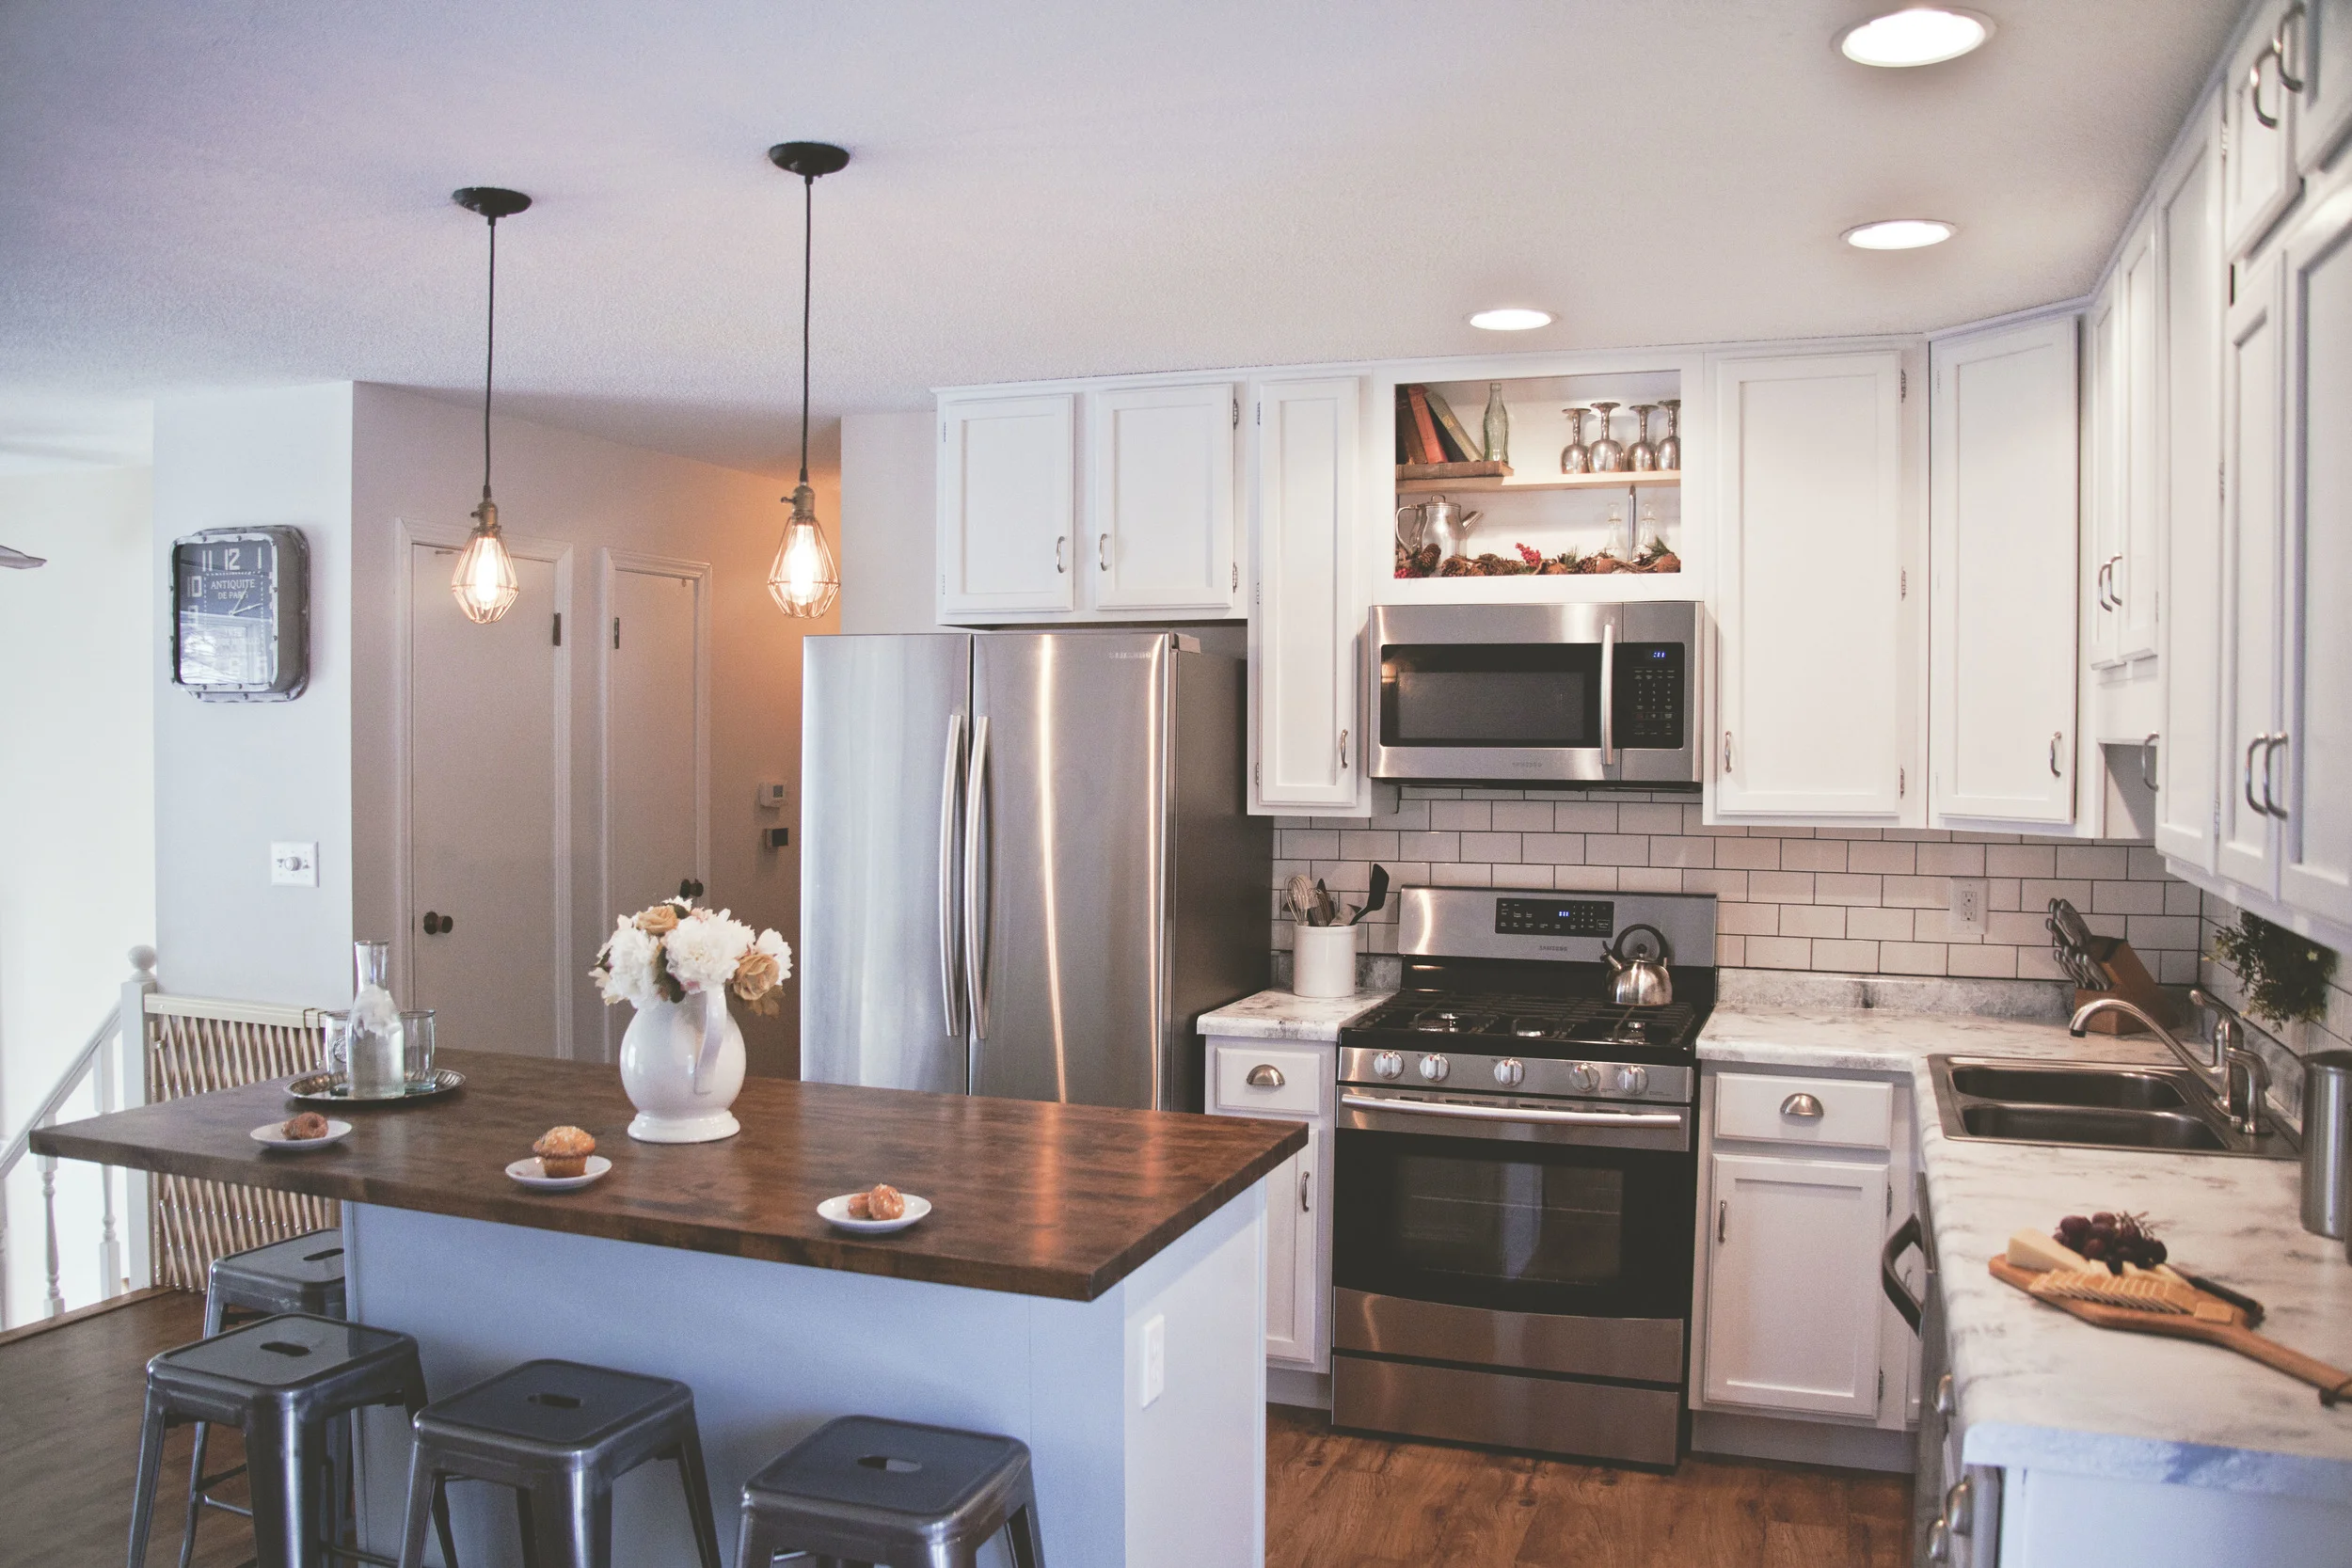
We decided to go with a more high end marble look for our finish, making the lines a bit harsher and making the paint a little thinner to bring out that watery look. I'll be doing a detailed step by step blog on how I achieved this exact look later this week so that you can do the same in your house too! We also decided to change the island countertop into a butcher block to warm up the space a bit.


Later this week I will be posting a step-by-step process of how I underwent this process and how you can too! Don't forget to tune in!
Not only did Giani Granite supply my countertop paint, but they also collaborated with me on my kitchen cabinets as well! I will be doing an all together separate blog on this topic, as well as a step by step process of HOW I refinished them! I am so thankful to have found this company! They are such a hospitable company with great customer service! If you want to learn more about their company and look at some more "how to's" check them out on:
Thanks so much Giani Granite for such an amazing experience! I LOVE my new kitchen thanks to YOU!
If you could redo one thing in your kitchen what would it be and why? Comment below! I love to see and hear your feedback!